Interacting through code#
The program architecture has been designed to flexibly provide different ways of running the program. For more advanced users, making custom parameter set runs with many advanced options may be quicker and easier by directly interacting with our Simulation class through C++ code instead of using the built-in command-line interface (CLI). This also allows further customisation of parameter reading methods.
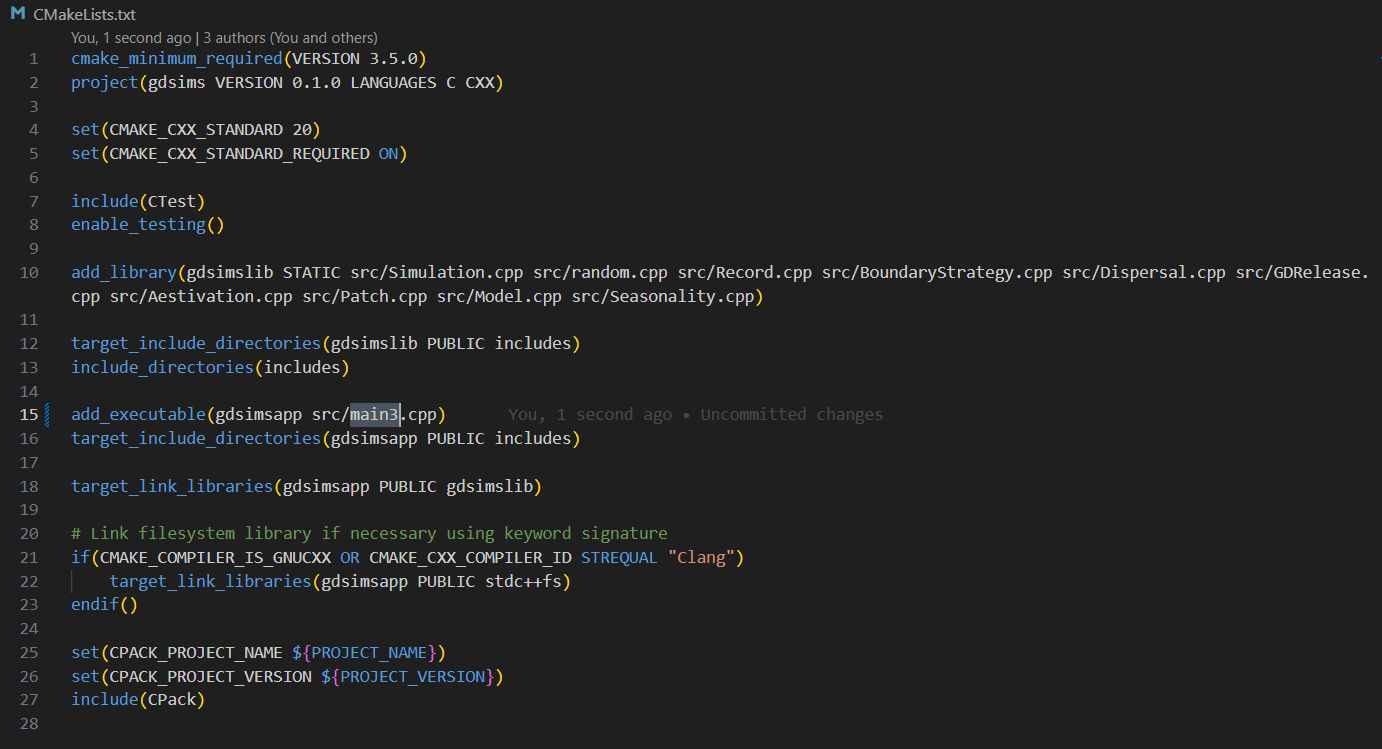
GDSiMS uses CMake as its build tool, with the corresponding CMakeLists.txt file provided in our repository. We can easily substitute the source file for the command-line interface, main.cpp, with our own user-defined source file (we can call this main3.cpp).
To do this:
Create a
main3.cppfile in thesrcfolder of your cloned repository. You can do this by opening a new file on the Notepad app on Windows or any other text editor and saving the file, making sure to include the.cppextension in replacement of.txt.Edit the file and save - look at the next section to choose what you want to include.
Open the
CMakeLists.txtfile in your cloned repository, this should be in thegdsimstop folder.Edit the
add_executable(gdsimsapp src/main.cpp)line, substitutingsrc/main.cppwithsrc/main3.cpp, and save.Re-build and re-compile the project with CMake (repeat steps 5-6 of the Windows installation instructions or steps 7-8 of the Mac instructions at Installation).
See also
- CMake documentation
Documentation for CMake, including a User Interaction Guide.
Caution
The CMake project will need to be re-built and re-compiled after making these changes (as explained in Installation).
What to include in your main3.cpp file#
To run the simulation with the default parameters of set 1, main3.cpp would look like this:
Pre-defined parameter set run
#include "Simulation.h" // load our GDSiMS Simulation class
#include "sets.h" // load the pre-defined sets data structures

int main() {
    Simulation simulation(set1); // create a simulation object using parameter set 1
    InheritanceParams inher; // create a data structure for the inheritance parameters
    inher.gamma = set1.gamma; // set the values of the above data structure to those from set 1
    inher.xi = set1.xi;
    inher.e = set1.e;
    simulation.set_inheritance(inher); // set the inheritance fraction of our simulation object using our parameters
    simulation.run_reps(); // run the simulation with its repetitions
}
sets.h contains the same pre-defined parameter sets used in the CLI for a quick start.
The Simulation class has different functions available to run the simulation and set Advanced options. Of these, the two essential ones are set_inheritance() and run_reps(), which set the inheritance fraction for each genotype and run the simulation (including all its repetitions) respectively. For information on other functions visit the class’ documentation.
The inheritance parameters are set separately to ensure these can be easily set by the user, in case these values are calculated using other models and need to be fed in.
To set all the advanced options, main3.cpp would look like this:
To create a custom parameter set, we can use the InputParams data structure, which defines all the parameters needed:
And similarly to the pre-defined parameter set, we can set the advanced options before we run the simulation.
Caution
The Simulation constructor (the function that creates the Simulation object) will not make bound or interval checks on the parameters. To see the allowed bounds for model parameters, visit the Custom sets page.
By modifying the main3.cpp file further, you can read the input parameters from a file. This feature is included by default in the CLI but it is understood that advanced users will want to define their own parameter reading method depending on their specific needs.
Tip
The inputval.h file in the project defines parameter file reading and bounds and interval checking functions used in the CLI which you may want to reuse. You will need to define the correct bounds for each parameter according to our Custom sets page.
Extending the model#
You may want to extend the model program. For example, by extending the number of genotypes modelled, the inheritance rates of these or the way this inheritance information is passed to the program. To do this, you would need to follow these steps:
Update the
constants::num_genconstant with your chosen number of genotypes.Update the
Simulation::set_inheritance()function with the new genotypes and respective inheritance rates for each. This functionality could be extended and/or overloaded depending on the problem - it just needs to set the internalSimulation::inher_fractionclass variable. For example, the function could be overloaded to take the inheritance parameters from a file.Make sure the new genotype arrays keep WD (wild-drive heterozygous genotype) in the same index (index 1), since this is used to release the WD gene drive mosquitoes (otherwise modify the index in
Patch::add_driver_M()).Update the class
Recordconstructor with the new headers for record files (the new genotype labels). And remember to update your plotting scripts later on!
You can follow similar steps to extend functions in the user-facing class Simulation. However, if model behaviour needs to be extended further, for example by adding specific fitness costs beyond inheritance to the new genotypes, this will involve extensions to deeper layers of code.